This post may contain affiliate links. If you purchase through a link on this page, we may earn a small commission at no extra cost to you.
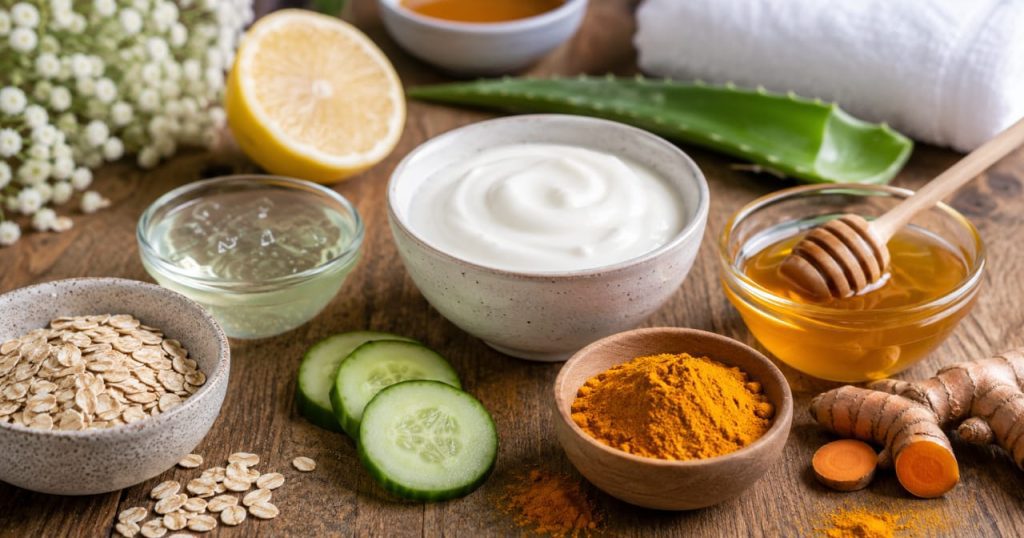
.Face mask for glowing skin at home is one of the easiest and most affordable ways to achieve naturally radiant skin using simple kitchen ingredients. Dull skin usually isn’t a mystery—it’s almost always caused by a combination of everyday habits and environmental factors. The good news is that many ingredients that help restore a healthy glow are probably already in your kitchen. This guide explains the best DIY recipes, ingredients, and skincare tips for naturally glowing skin.
This guide covers exactly that: why skin looks dull in the first place, the ingredients worth reaching for, 1 5 full DIY mask recipes organized by skin type and concern, safety guidance, and a small section of ready-made options for days when you’d rather skip the mixing bowl
.A face mask for glowing skin at home is one of the easiest ways to improve dull-looking skin naturally with simple kitchen ingredients.
Table of Contents
- Why Does Skin Look Dull?
- Benefits of Homemade Face Masks
- Best Ingredients for Glowing Skin
- How to Do a Patch Test
- 1 5 DIY Face Mask Recipes
- Face Masks by Skin Type
- Face Masks by Skin Concern
- How Often Should You Use a Face Mask
- Common Mistakes to Avoid
1 0. How Long Does It Take to See Results 1 1 . Can You Store Homemade Face Masks 1 2. Who Should Avoid DIY Face Masks
1 3. Frequently Asked Questions
1 4. Best Ready-Made Face Masks for Glowing Skin
1 5. Final Thoughts
- Face Mask for Glowing Skin at Home: Why Does Skin Look Dull?
Before reaching for any mask, it helps to understand what’s actually causing the dullness, since different causes respond better to different ingredients.
Dead skin cell buildup: Skin naturally sheds cells, but when they build up on the surface instead of shedding properly, they create a rough, dull-looking layer that blocks light from reflecting evenly.
Dehydration: Skin that lacks water looks flat and tired, even if it isn’t necessarily dry in terms of oil production. Dehydration and dryness aren’t the same thing, and both can cause dullness.
Sun damage: Cumulative UV exposure leads to uneven pigmentation and a rougher skin texture over time, both of which contribute to a dull appearance.
Lack of sleep: Poor sleep reduces blood flow to the skin and increases cortisol, which can leave skin looking pale, tired, and less radiant.
Poor diet: A diet low in antioxidants, healthy fats, and hydration can show up on the skin as dullness, since skin health is partly influenced by overall nutrition.
Stress: Chronic stress raises cortisol levels, which can affect oil production, inflammation, and skin barrier function, all of which impact how bright or dull skin looks.
- Benefits of Homemade Face Masks
Homemade masks aren’t a replacement for a full skincare routine, but they offer some real advantages:
Natural ingredients you can see and understand, without a long list of unfamiliar chemical names
Affordable, since most recipes use items already in your kitchen
Chemical-free, which can appeal to people trying to simplify their routine
Hydration, from ingredients like honey, aloe vera, and avocado
Brightening, from ingredients like turmeric, yogurt, and rice flour
Gentle exfoliation, from ingredients like oatmeal and rice flour that help remove dead skin buildup
- Best Ingredients for Glowing Skin
| Ingredient | Benefits | Best For |
| Honey | Hydration, mild antibacterial properties | Dry skin |
| Turmeric | Brightening, antioxidant support | Dull skin |
| Aloe Vera | Soothing, calming | Sensitive skin |
| Yogurt | Gentle exfoliation from lactic acid | Uneven skin tone |
| Oatmeal | Calming, gentle exfoliation | Acne-prone skin |
| Avocado | Nourishing, rich in fatty acids | Dry skin |
| Banana | Softening, mild hydration | Normal skin |
| Cucumber | Cooling, soothing | Irritated skin |
| Green Tea | Antioxidants | Aging or dull skin |
| Rice Flour | Gentle exfoliation, mild brightening | Tan and dullness |
- How to Do a Patch Test
Even natural ingredients can cause a reaction, so a patch test is worth doing before applying any new mask to your whole face.
- Where to apply: Apply a small amount of the mixture to your inner forearm or behind your ear.
- How long to wait: Leave it on for 24 hours, checking periodically for any reaction.
- When to stop: If you notice redness, itching, burning, or swelling at any point, wash it off immediately and avoid using that ingredient combination on your face.
- 1 5 DIY Face Mask Recipes
Recipe 1 : Honey and Turmeric
Ingredients: 1 tablespoon raw honey, a small pinch of turmeric powder
Preparation: Mix into a smooth paste in a small bowl
How to Apply: Apply evenly to clean, dry skin, avoiding the eye area
Leave-On Time: 1 0-1 5 minutes
Benefits: Brightening and mild antibacterial support
Best Skin Type: Dull, normal to dry skin
Frequency: 2-3 times per week
Recipe 2: Yogurt and Honey
Ingredients: 1 tablespoon plain yogurt, 1 teaspoon honey
Preparation: Stir together until fully combined How to Apply: Apply a thin, even layer to the face Leave-On Time: 1 0-1 5 minutes
Benefits: Gentle exfoliation and hydration Best Skin Type: Uneven, dull, or normal skin Frequency: 2-3 times per week
Recipe 3: Aloe Vera and Cucumber
Ingredients: 1 tablespoon fresh aloe vera gel, 2 tablespoons grated cucumber
Preparation: Blend or mash together into a smooth mixture How to Apply: Apply generously, especially to irritated areas Leave-On Time: 1 5 minutes
Benefits: Soothing and cooling
Best Skin Type: Sensitive or irritated skin
Frequency: Up to daily if needed
Recipe 4: Banana and Honey
Ingredients: Half a ripe banana, 1 teaspoon honey Preparation: Mash the banana thoroughly, then mix in honey How to Apply: Apply a thick layer to clean skin
Leave-On Time: 1 5-20 minutes Benefits: Softening and mild hydration Best Skin Type: Normal to dry skin Frequency: 2 times per week
Recipe 5: Oatmeal and Yogurt
Ingredients: 2 tablespoons ground oatmeal, 1 tablespoon plain yogurt
Preparation: Mix into a thick, spreadable paste
How to Apply: Apply and gently massage in circular motions
Leave-On Time: 1 0 minutes
Benefits: Calming and gentle exfoliation Best Skin Type: Acne-prone or sensitive skin Frequency: 2 times per week
Recipe 6: Rice Flour and Milk
Ingredients: 2 tablespoons rice flour, enough milk to form a paste
Preparation: Mix until you get a spreadable consistency How to Apply: Apply evenly, focusing on dull or tanned areas Leave-On Time: 1 5 minutes
Benefits: Gentle exfoliation and mild brightening
Best Skin Type: Dull or tanned skin
Frequency: 2 times per week
Recipe 7: Avocado and Honey
Ingredients: Half a ripe avocado, 1 teaspoon honey
Preparation: Mash together until smooth
How to Apply: Apply a generous layer to the face and neck
Leave-On Time: 1 5-20 minutes Benefits: Deeply nourishing Best Skin Type: Dry skin Frequency: 1 -2 times per week
Recipe 8: Coffee and Yogurt
Ingredients: 1 tablespoon finely ground coffee, 1 tablespoon plain yogurt
Preparation: Mix into a paste
How to Apply: Apply and gently massage before rinsing
Leave-On Time: 1 0 minutes
Benefits: Gentle exfoliation, temporary brightening
Best Skin Type: Normal to oily skin
Frequency: Once a week
Recipe 9: Papaya and Honey
Ingredients: 2 tablespoons mashed ripe papaya, 1 teaspoon honey
Preparation: Mash the papaya well, then mix in honey How to Apply: Apply an even layer to clean skin Leave-On Time: 1 5 minutes
Benefits: Gentle enzymatic exfoliation, brightening
Best Skin Type: Dull or uneven skin
Frequency: 2 times per week
Recipe 1 0: Tomato and Oatmeal
Ingredients: 1 tablespoon tomato pulp, 1 tablespoon ground oatmeal
Preparation: Mix into a coarse paste
How to Apply: Apply evenly, avoiding the eye area
Leave-On Time: 1 0-1 5 minutes Benefits: Mild brightening, oil control Best Skin Type: Oily or combination skin Frequency: 2 times per week
Recipe 1 1 : Gram Flour and Turmeric
Ingredients: 2 tablespoons gram flour (besan), a small pinch of turmeric, water or milk to mix
Preparation: Combine into a smooth paste
How to Apply: Apply evenly and let dry slightly before rinsing
Leave-On Time: 1 5 minutes
Benefits: Gentle exfoliation, brightening Best Skin Type: Normal to oily skin Frequency: 2 times per week
Recipe 1 2: Green Tea and Honey
Ingredients: 1 tablespoon cooled, brewed green tea, 1 teaspoon honey Preparation: Mix together, adding a small amount of oatmeal if a thicker texture is needed
How to Apply: Apply evenly to clean skin Leave-On Time: 1 0-1 5 minutes Benefits: Antioxidant support
Best Skin Type: Aging or dull skin
Frequency: 2 times per week
Recipe 1 3: Multani Mitti and Rose Water
Ingredients: 2 tablespoons multani mitti (fuller’s earth), rose water to mix
Preparation: Combine into a smooth, spreadable paste
How to Apply: Apply an even layer, avoiding letting it fully harden and crack
Leave-On Time: 1 0-1 5 minutes
Benefits: Oil absorption, mild brightening
Best Skin Type: Oily skin
Frequency: 1 -2 times per week
Recipe 1 4: Cucumber and Aloe Vera
Ingredients: 2 tablespoons grated cucumber, 1 tablespoon aloe vera gel
Preparation: Mix together into a light, watery paste How to Apply: Apply generously and relax while it sits Leave-On Time: 1 5 minutes
Benefits: Cooling and soothing
Best Skin Type: Sensitive or irritated skin
Frequency: Up to daily if needed
Recipe 1 5: Cocoa and Honey
Ingredients: 1 tablespoon unsweetened cocoa powder, 1 tablespoon honey
Preparation: Mix into a smooth paste
How to Apply: Apply an even layer to clean skin
Leave-On Time: 1 5 minutes
Benefits: Antioxidant support, hydration Best Skin Type: Normal to dry skin Frequency: 1 -2 times per week
- Face Masks by Skin Type
Dry Skin: Avocado and Honey, Banana and Honey, and Cocoa and Honey all offer rich hydration without exfoliating too aggressively.
Oily Skin: Multani Mitti and Rose Water, Tomato and Oatmeal, and Gram Flour and Turmeric help absorb excess oil while still brightening.
Combination Skin: Yogurt and Honey or Rice Flour and Milk work well across both oily and dry areas without over-treating either.
Sensitive Skin: Aloe Vera and Cucumber or Cucumber and Aloe Vera alone are the gentlest options, with minimal risk of irritation.
Acne-Prone Skin: Oatmeal and Yogurt is calming and gentle, avoiding heavier oils that could feel too rich for breakout-prone skin.
- Face Masks by Skin Concern
Dull Skin: Honey and Turmeric or Papaya and Honey both target dullness through gentle brightening and mild exfoliation.
Tan Removal: Rice Flour and Milk or Gram Flour and Turmeric are traditional choices for gradually fading the look of tanning.
Dark Spots: Consistent use of Honey and Turmeric or Papaya and Honey over several weeks may help gradually soften the appearance of dark spots, though results are gentle compared to formulated brightening products.
Acne Marks: Oatmeal and Yogurt is gentle enough for regular use on skin recovering from breakouts.
Dry Patches: Avocado and Honey delivers concentrated moisture for particularly dry, flaky areas.
Fine Lines: Green Tea and Honey offers antioxidant support that may help support skin’s overall resilience over time, though it won’t dramatically change deep lines.
- How Often Should You Use a Face Mask?
Oily skin: Two to three times a week, favoring oil-absorbing ingredients like multani mitti or gram flour.
Dry skin: One to two times a week, favoring richer, more hydrating ingredients like avocado or honey.
Sensitive skin: As needed, since gentle soothing masks like aloe vera and cucumber are generally safe for more frequent use.
Normal skin: Two to three times a week is generally a comfortable baseline for most normal skin types.
- Common Mistakes to Avoid
Using lemon directly on the skin — raw lemon juice is highly acidic and can cause irritation, sensitivity to the sun, or even chemical burns in some cases
Using too much turmeric — excess turmeric can stain the skin yellow temporarily and increases the risk of irritation for sensitive skin
Applying with a dirty brush or fingers — this can introduce bacteria to the skin, especially concerning for acne-prone skin
Skipping the patch test — even natural ingredients can trigger allergic reactions in some people
Leaving a mask on for too long — ingredients like multani mitti can over-dry the skin if left on until fully hardened and cracking
Using a face mask for glowing skin at home two or three times a week can help maintain a brighter and healthier-looking complexion.
1 0. How Long Does It Take to See Results?
First use: Most people notice an immediate, temporary glow right after rinsing off a mask, largely from hydration and gentle exfoliation.
Two weeks: With consistent use two to three times a week, skin texture often starts to feel smoother and more even.
Four weeks: Dullness and mild discoloration typically show more noticeable improvement by this point, assuming consistent, regular use.
Consistency matters most: A single mask won’t transform your skin. The real benefit comes from repeated, consistent use over several weeks alongside a basic daily skincare routine.
1 1 . Can You Store Homemade Face Masks?
Some homemade masks can be stored briefly, but many contain fresh, perishable ingredients that don’t keep well.
Fridge storage: Masks made with yogurt, cucumber, or aloe vera can typically be refrigerated for one to two days in an airtight container.
Airtight container: Always store any leftover mask in a sealed, airtight container to slow spoilage and prevent contamination.
Maximum storage time: As a general rule, don’t keep any homemade mask longer than two to three days, and always check for any change in smell or texture before reapplying.
When fresh is better: Masks containing banana, avocado, or papaya are best made fresh each time, since these ingredients oxidize and spoil quickly once mashed.
1 2. Who Should Avoid DIY Face Masks?
While generally low-risk, DIY masks aren’t right for everyone. You may want to avoid them, or check with a dermatologist first, if you have:
Known allergies to any of the ingredients involved, including common ones like honey or dairy
Open wounds or active cuts on the face, since this increases infection risk
Active eczema or another inflamed skin condition, where new ingredients could trigger a flare-up
Skin infections, including active fungal or bacterial infections
Recent chemical peels or other professional treatments, since freshly treated skin is more sensitive and vulnerable to irritation
Choosing the right face mask for glowing skin at home depends on your skin type, ingredients, and consistenc
1 3. Frequently Asked Questions
Which face mask is best for glowing skin?
It depends on your skin type, but Honey and Turmeric is one of the most commonly recommended options for general brightening across most skin types.
Can I use a face mask every day?
Gentle masks like aloe vera and cucumber can often be used daily, but most other DIY masks are better limited to two to three times a week to avoid over-exfoliating or irritating the skin.
Is turmeric safe for sensitive skin?
Turmeric is generally mild, but sensitive skin should use only a small pinch and patch test first, since it can occasionally cause irritation or temporary staining.
Which homemade mask removes tan?
Rice Flour and Milk or Gram Flour and Turmeric are traditional choices believed to help gradually fade the look of tanning with consistent use.
Can I leave a face mask overnight?
Most DIY masks are not meant to be left on overnight, since prolonged exposure to raw, perishable ingredients can irritate the skin or promote bacterial growth.
Are DIY masks better than store-bought masks?
Not necessarily better, just different. DIY masks are simple, affordable, and chemical-free, while store-bought masks often use more concentrated, stabilized active ingredients for stronger or faster results.
Can I mix multiple mask recipes together?
It’s better to stick to one recipe at a time rather than combining several, since this makes it easier to identify what’s working and reduces the risk of irritation from too many ingredients at once.
Do DIY face masks actually remove dark spots?
They may help gradually soften the appearance of mild discoloration over time, but formulated products with ingredients like alpha arbutin or vitamin C are generally more effective for stubborn dark spots.
What should I do after removing a face mask?
Rinse thoroughly with lukewarm water, pat your skin dry, and follow with a regular moisturizer to lock in hydration.
Can men use these DIY face masks too?
Yes, none of these recipes are gender-specific, and the same ingredients work the same way regardless of who’s using them.
1 4. Best Ready-Made Face Masks for Glowing Skin
If you don’t always have time to prepare a fresh mask, a few ready-made options can deliver similar brightening and hydrating benefits with far less effort.
Honey and Yogurt Hydrating Sheet Mask: A convenient, single-use sheet mask formulated with similar hydrating ingredients to the DIY honey and yogurt recipe, useful for a quick glow before an event.
👉 View on Amazon
Turmeric and Niacinamide Brightening Mask: A wash-off cream mask combining turmeric extract with niacinamide for a more stable, longer-lasting brightening effect than raw turmeric alone.
👉 View on Amazon
Multani Mitti Clay Mask: A ready-mixed clay mask for oily skin that offers the same oil-absorbing benefits as DIY multani mitti without needing to measure or mix anything.
👉 View on Amazon
Aloe Vera Soothing Gel Mask: A pre-formulated, fragrance-free gel mask suited to sensitive or irritated skin that wants the same calming benefits as fresh aloe vera in a shelf-stable format.
👉 View on Amazon
Comparison Table:
Ready-Made Mask | Closest DIYEquivalent | Best For |
| Honey and Yogurt Hydrating Sheet Mask | Yogurt and Honey | Quick glow, occasional use |
| Turmeric and Niacinamide Brightening Mask | Honey andTurmeric | Consistent, longer-lasting brightening |
Multani Mitti Clay Mask | Multani Mitti and Rose Water | Oily skin, oil control |
| Aloe Vera Soothing Gel Mask | Aloe Vera and Cucumber | Sensitive or irritated skin |
Pros of ready-made masks: No preparation time, longer shelf life, more stable and concentrated active ingredients.
Cons of ready-made masks: Higher cost per use compared to kitchen
ingredients, less flexibility to adjust for your specific skin on a given day.
For more expert advice on healthy skincare routines, sun protection, and ingredients for glowing skin, visit the American Academy of Dermatology (AAD). Their dermatologist-reviewed guidance can help you care for your skin safely.
1 5. Final Thoughts
A face mask for glowing skin at home doesn’t need to be complicated. Understanding what’s actually causing your dullness, whether that’s dehydration, dead skin buildup, or simply a stressful week, makes it much easier to pick the right ingredient rather than guessing.
Start with one or two recipes that match your skin type, be consistent for at least a few weeks, and don’t be afraid to mix in a ready-made option on days when you don’t have time to prepare something fresh. Glowing skin is less about finding one perfect ingredient and more about steady, gentle care over time.
If you stay consistent, a face mask for glowing skin at home can become an effective part of your weekly skincare routine
For more beauty guides, check out our face mask for bright skin and top vitamin C serum for glowing skin articles.
Disclaimer: This article is for general informational purposes. Individual skin reactions vary, and a patch test is recommended before trying any new ingredient. If