As an Amazon Associate, I earn from qualifying purchases. This means if you click a link and make a purchase, I may earn a small commission at no extra cost to you.
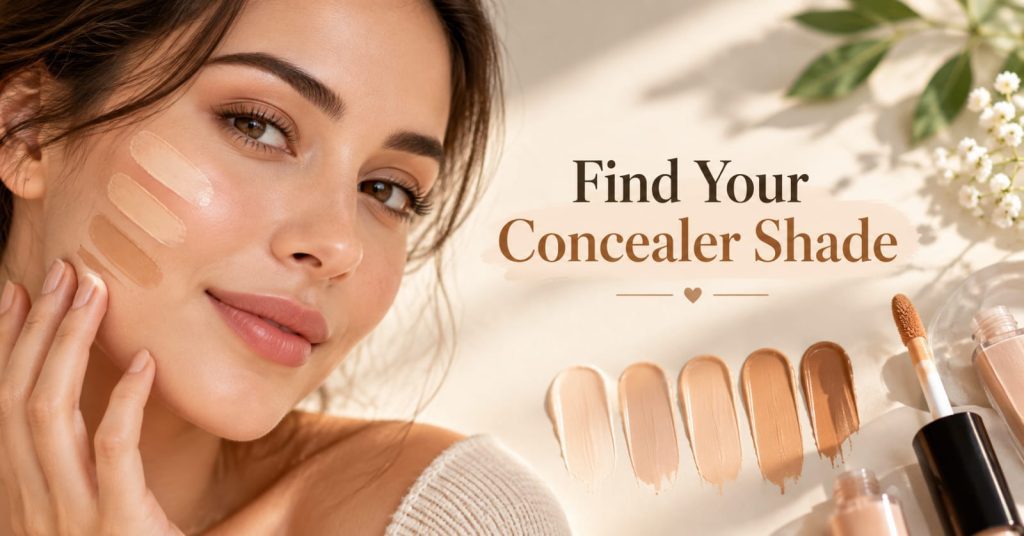
If you’ve ever bought a concealer that looked perfect in the store and turned orange, gray, or chalky the second you got home, you’re not alone. Most of the time, the problem isn’t your skin. It’s that “concealer shade” is actually three separate things — your depth, your undertone, and what you’re using the concealer for — and most shopping guides only ever explain one of them.
This guide walks through the whole process of how to find your concealer shade, whether you’re standing in a drugstore aisle, shopping online with no way to swatch anything, trying to match a shade from a completely different brand, or just trying to figure out why your “perfect match” looks wrong in the mirror.
Table of Contents
Quick Answer Skin Depth vs. Undertone: Know the Difference
Step 1 Find Your Skin Depth
Step 2: Find Your Undertone What If Your Undertone Tests Disagree?
Understanding Olive Undertones
Step 3: Decide What You Actually Need Concealer For Should Concealer Match or Be Lighter Than Foundation?
How to Find Your Concealer Shade Without Foundation
How to Find Your Concealer Shade Online Can You Find Your Concealer Shade From a Photo?
Matching Your Shade Across Brands
How to Test a Concealer Shade the Right Way
Why Your Concealer Looks Orange, Gray, Pink, or Ashy Concealer vs. Color Corrector
Does Your Shade Change With the Seasons?
Comparison Table 10 Concealers Worth Trying, by Shade Range and Coverage Common Shade-Matching Mistakes
Frequently Asked Questions
Final Thoughts
Quick Answer
To find your concealer shade, start with two separate things: your skin depth (how light or deep your complexion is) and your undertone (warm, cool, neutral, or olive). Then decide what you’re using the concealer for, since a shade for covering a blemish isn’t always the same shade you’d use to brighten under your eyes. Test two or three close options along your jawline in natural daylight, and give the formula a minute to set before judging the color.
Skin Depth vs. Undertone: Know the Difference
This is the single most confusing part of shade matching, and almost every bad concealer purchase traces back to mixing these two things up.
Skin depth is simply how light or deep your complexion is. Think fair, light, medium, tan, or deep.
Undertone is the subtle color underneath that depth — warm, cool, neutral, or olive. Your undertone generally stays consistent, while your depth can shift a little with the seasons.
Two people can both be “medium” and still need completely different concealers, because one might be medium-warm and the other medium-cool. Saying “I’m medium” tells a brand almost nothing on its own. You need both pieces before a shade name means anything.
Step 1: Find Your Skin Depth
Look at your face in natural daylight, not overhead indoor lighting, which can wash out or exaggerate your actual color. Compare your face to your neck and jawline, since these areas are usually closest to your true depth (your hands and arms are often a different color and aren’t a reliable reference).
Most brands use some version of this scale:
- Fair
- Light
- Light-Medium
- Medium
- Tan
- Medium-Deep
- Deep
If you sit between two of these, that’s normal. Rather than forcing yourself into one label, plan to test both the lighter and deeper option next to each other later on.
Step 2: Find Your Undertone
Once you know roughly how deep you are, undertone narrows things down. Use more than one test, since any single one can be misleading depending on lighting.
The vein test. Look at the veins on your inner wrist in natural light. Greenish veins usually point to warm, blue or purple to cool, and a mix of both to neutral.
The jewelry test. Try on gold and silver jewelry side by side. If gold looks more flattering, that leans warm; if silver does, that leans cool; if both work equally well, that’s often neutral.
The white-paper test. Hold a plain white sheet of paper next to your face in daylight. A yellow or golden cast against the paper suggests warm, a pink or rosy cast suggests cool, and little noticeable shift suggests neutral.
The sun test. If your skin tans easily and rarely burns, that often leans warm. If you burn before you tan, that often leans cool.
None of these tests is perfect on its own, which is exactly why so many people give up on figuring out their undertone. Use them together as clues, not as a final verdict.
What If Your Undertone Tests Disagree?
This happens more often than any single beauty guide admits. Your veins might say warm, your jewelry test might say neutral, and the white paper might look slightly pink.
When that happens:
- Don’t lock in an answer from one test alone.
- Check your results in actual daylight near a window, not under indoor bulbs.
- Buy or sample two or three shades with different undertones and swatch them along your jawline.
- Trust the swatch that blends in and disappears, not the test result on paper.
The swatch test on your actual skin always outranks a vein or jewelry test. Those are just starting points to narrow your options before you buy anything.
Understanding Olive Undertones
Olive is the undertone most shade-matching guides either skip entirely or barely mention, even though it’s extremely common. Olive skin tends to carry a subtle green or golden-gray cast that doesn’t fit neatly into “warm” or “neutral.”
Signs you might be olive rather than simply warm or neutral:
- Warm, golden concealers often look too orange or too yellow on you.
- Pink or rosy concealers can look chalky or too cool.
- Neutral shades sometimes look close, but slightly “off” or muddy.
- Your skin has a faint green or gray-green cast in natural light, especially compared to a strictly warm or cool complexion.
If this sounds like you, look specifically for shades labeled “olive,” “warm olive,” or “neutral olive” when a brand offers them. If a brand doesn’t offer an olive option, a true neutral shade is usually a safer starting point than a heavily warm or heavily pink one.
Step 3: Decide What You Actually Need Concealer For
This is the step most people skip, and it’s the reason so many “correctly matched” concealers still look wrong once applied. A single concealer shade rarely works for every purpose.
| What you’re doing | Starting point |
|---|---|
| Covering a blemish or dark spot | Match your exact skin tone and undertone |
| Brightening under the eyes | Slightly lighter, same undertone family |
| Highlighting (nose, brow bone, cupid’s bow) | Noticeably lighter |
| Contouring | Deeper, often slightly cooler |
For blemishes, the goal is to disappear. A shade that’s too light draws more attention to the spot instead of hiding it. For under-eyes, a touch of lightness can brighten a tired look, but going too far lighter can create a gray or chalky “reverse raccoon” effect instead. There’s no harm in owning two shades if your budget allows it — one for spot concealing, one for brightening.
Should Concealer Match or Be Lighter Than Foundation?
The honest answer is: it depends on where you’re using it. For blemishes and general spot coverage, matching your foundation as closely as possible almost always looks the most natural. For under-eye brightening, going one shade lighter is a common approach — but “one shade lighter” isn’t a fixed, universal measurement, because shade increments differ from brand to brand. Treat it as a general direction, then confirm with an actual swatch rather than assuming the math works the same way everywhere.
How to Find Your Concealer Shade Without Foundation
If you don’t wear foundation, or you’ve never figured out your foundation shade, you can still work through this the same way:
- Determine your skin depth using your face, neck, and jawline in daylight.
- Run through the undertone tests above.
- Decide your purpose (blemish, under-eye, highlight, contour).
- Pick two or three candidate shades close to your depth and undertone.
- Swatch them on your jawline, not your hand.
- Let each one sit for a minute or two, then check again in daylight.
- Choose whichever one blends in rather than sitting on top of the skin.
This process works whether or not you’ve ever bought a foundation in your life.
How to Find Your Concealer Shade Online
Buying concealer without being able to swatch it in person is genuinely harder, but it’s manageable if you go in with a plan:
- Know your skin depth and undertone before you start browsing.
- Read the brand’s shade description, not just the shade name (a name like “Medium 3” tells you almost nothing on its own).
- Look for real customer photos in reviews, ideally in daylight and without a filter.
- Use the brand’s shade finder or quiz if one is available, but treat the result as a starting recommendation, not a guarantee.
- Check the site’s return or exchange policy before you buy, in case the shade doesn’t work out.
- If you’re between two shades, it’s often smarter to order both and return the one that doesn’t match, rather than guessing.
Online shade finders and AI-based matching tools can genuinely narrow your options, but even the brands running them are usually upfront that lighting, screen calibration, and photo quality can all affect the result. Use them as a shortcut, not the final word.
Can You Find Your Concealer Shade From a Photo?
This is possible, and a lot of brands now offer selfie-based shade matching. But a photo match is only as good as the photo:
- Use natural daylight near a window, not overhead indoor lighting.
- Remove makeup from the area you’re photographing.
- Turn off any beauty filter, skin-smoothing mode, or color filter on your camera.
- Face the camera directly with a neutral background.
- Avoid an overexposed or heavily edited photo.
Even with all of that done correctly, remember that phone cameras process color differently, and screens display color differently too. A photo-based match is a solid starting recommendation, not a substitute for testing the actual product on your skin when you can.
Matching Your Shade Across Brands
If you already know your shade in one brand and want to try another, don’t assume the same shade name or number will translate directly. “Medium 3” in one line is not automatically the same color as “Medium 3” in another. Instead:
- Start from a shade you know is genuinely a good match, not just close.
- Note its depth and undertone, using the brand’s own description if it gives one.
- Look at the new brand’s shade chart for a similarly described option.
- Compare actual swatches or swatch photos side by side where you can.
- Check that the coverage and finish are reasonably similar, since a sheer tinted moisturizer and a full-coverage concealer won’t necessarily read the same way even at an identical shade name.
Cross-brand shade-matching databases exist and can be a useful shortcut here, but they work best when you feed them a shade you’re already confident about, not a guess.
How to Test a Concealer Shade the Right Way
A lot of shade-matching mistakes happen because people judge a swatch too quickly, or in the wrong spot.
- Swatch along your jawline or lower cheek, not your hand or wrist.
- Compare two or three shades side by side rather than one at a time.
- Blend each one in fully.
- Wait a minute or two. Some formulas oxidize and can look noticeably darker, warmer, or more orange once they’ve set.
- Step into daylight, ideally near a window, before making a final call.
- Ask which shade disappears into your skin rather than which one “looks nicest” in isolation.
If a shade only looks right for the first ten seconds and then shifts, that’s useful information — not necessarily a sign you need to abandon the shade family, just that formula’s dry-down doesn’t work for you.
Why Your Concealer Looks Orange, Gray, Pink, or Ashy
If your shade still looks off after testing, use this as a rough troubleshooting guide:
Too orange: Usually an undertone that’s too warm, or oxidation that darkened the formula after it set.
Too gray or ashy: Often means the shade is too light for your depth, or the undertone doesn’t suit you — this is especially common under the eyes when someone goes too far lighter than their skin.
Too pink: The undertone likely leans cooler than your actual skin.
Too yellow: The undertone is probably warmer or more golden than what your skin needs.
Looks obvious no matter what: The depth and undertone may both be slightly off, or the formula’s finish is fighting with your skin texture rather than a shade problem at all.
Concealer vs. Color Corrector
These get confused constantly, and they’re not the same tool. A color corrector is chosen specifically to neutralize discoloration — green cancels out redness, peach or orange can offset blue or purple darkness depending on your depth. A concealer, on the other hand, is chosen to match your skin so it blends in.
For mild discoloration, a well-matched concealer alone is often enough. For more noticeable dark circles or redness, correcting first and then layering a skin-matching concealer over it tends to give a more natural result than trying to cover everything with concealer alone.
Does Your Shade Change With the Seasons?
For a lot of people, yes, at least a little. Sun exposure can deepen your complexion in the warmer months, and it can fade back closer to your baseline in winter. If your depth shifts noticeably between seasons, it’s reasonable to keep two nearby shades on hand rather than assuming one will work year-round. Undertone typically stays the same even when depth shifts.
Comparison Table
| Concealer | Finish | Best For | Shade Range |
|---|---|---|---|
| Maybelline Instant Age Rewind | Natural, brightening | Under-eye circles, budget shoppers | Wide, warm/neutral/cool |
| L’Oréal True Match Super-Blendable | Natural | Blemishes and under-eye | Extensive, matched to True Match foundation |
| e.l.f. 16HR Camo Concealer | Full coverage, matte | Oily/combination skin, blemishes | Wide, incl. deep shades |
| NARS Radiant Creamy Concealer | Luminous, buildable | Under-eye, general use, olive undertones | Very wide, incl. olive |
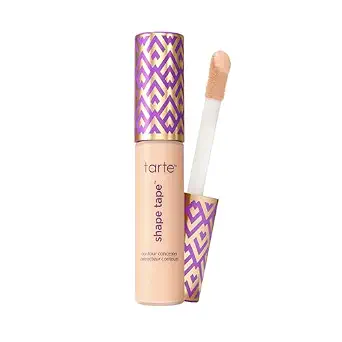
| Tarte Shape Tape Concealer | Full coverage, matte-ish | Long wear, photography | Wide, incl. deep and cool shades |
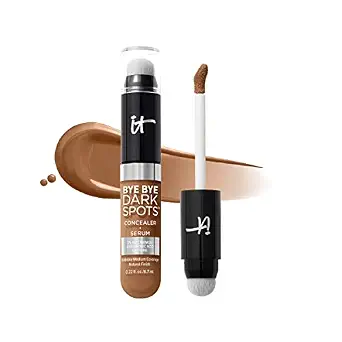
| IT Cosmetics Bye Bye Under Eye | Full coverage, brightening | Dark circles specifically | Wide |
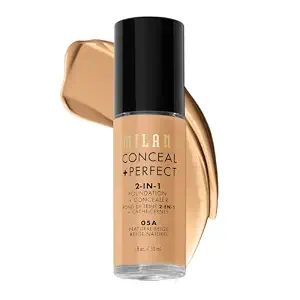
| Milani Conceal + Perfect 2-in-1 | Natural to full | Budget, color-correcting options | Wide, incl. correctors |
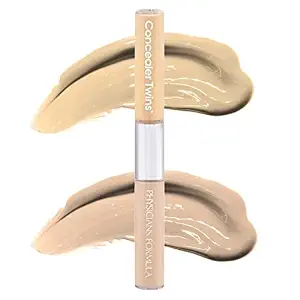
| Physicians Formula Concealer Twins | Cream, dual-shade | Contouring and highlighting together | Limited but versatile |
| Revlon ColorStay Concealer | Long-wear, matte | All-day wear, oily skin | Moderate |
| ColourPop No Filter Matte Concealer | Matte, full coverage | Budget shoppers, wide undertone range | Very wide, incl. olive |
10 Concealers Worth Trying, by Shade Range and Coverage
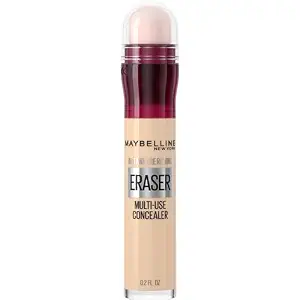
1. Maybelline Instant Age Rewind Eraser Dark Circles Concealer
A long-running drugstore favorite built specifically for under-eye brightening, with a light, blendable formula and a decent range of undertones for the price. A solid starting point if you’re testing the “slightly lighter under the eyes” approach without spending much
2. L’Oréal Paris True Match Super-Blendable Concealer
Designed to pair with L’Oréal’s True Match foundation shade names, which makes it a good option if you’ve already identified your depth and undertone using their system. Works well for both blemishes and general concealing.

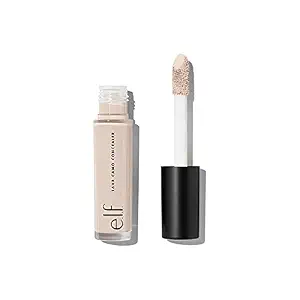
3. e.l.f. 16HR Camo Concealer
A high-coverage, matte formula aimed at oily and combination skin, with one of the wider shade ranges at this price point, including several deeper options. Worth knowing it can dry slightly darker, so give it a minute before judging the color
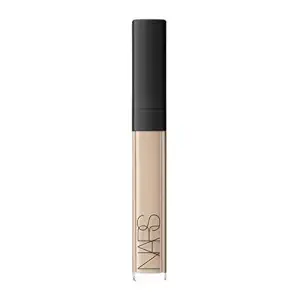
4. NARS Radiant Creamy Concealer
A prestige pick with a genuinely broad shade range that includes dedicated olive-leaning options, which is rare. The luminous, buildable finish works for both spot concealing and light under-eye brightening.
5. Tarte Shape Tape Concealer
Known for full coverage and long wear, which makes it popular for photos and long days. The shade range skews wide, with options for both cool and deep undertones.
6. IT Cosmetics Bye Bye Under Eye Concealer
Built specifically around brightening and covering dark circles, with a creamy, full-coverage formula. A good option if under-eye correction is your main concern rather than all-over spot concealing.
7. Milani Conceal + Perfect 2-in-1 Foundation + Concealer
A budget-friendly option that also includes color-correcting shades alongside standard skin-matching ones, useful if you’re exploring the corrector-versus-concealer question from earlier in this guide.
8. Physicians Formula Concealer Twins Cream Concealer
A two-toned stick that pairs a matching shade with a highlighting or contouring shade in one product, which is handy for the “one shade isn’t enough” situations covered above.
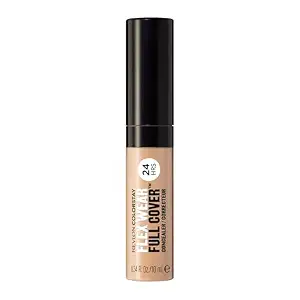
9. Revlon ColorStay Concealer
A long-wear, matte drugstore option built for all-day coverage, particularly suited to oilier skin types that need a concealer to hold up without sliding.
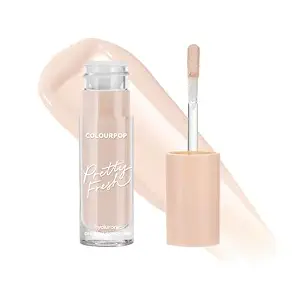
10. ColourPop No Filter Matte Longwear Concealer
An affordable, full-coverage matte concealer with a genuinely wide undertone range, including olive-leaning shades that are harder to find at this price point.
Common Shade-Matching Mistakes
- Testing a shade only on your hand or wrist instead of your jawline.
- Judging the color immediately instead of waiting for it to set.
- Relying on a single undertone test instead of cross-checking a few.
- Assuming the same shade name means the same color in a different brand.
- Buying one shade for your entire face when blemishes, under-eyes, highlighting, and contouring may each want something slightly different.
- Shopping only under store lighting and skipping a daylight check.
- Blaming the shade when the actual issue is coverage or finish, not color.
Frequently Asked Questions
How do I find my concealer shade if I don’t know my foundation shade? Start with your skin depth and undertone directly, using the jawline swatch method and daylight check described above. You don’t need a foundation shade to work through this process.
Should my concealer be lighter than my foundation? Not always. For blemishes, matching as closely as possible tends to look the most natural. For under-eye brightening, going a shade lighter is common, but treat it as a general guideline rather than an exact rule.
How do I find my concealer shade online without swatching it in person? Know your depth and undertone in advance, read the brand’s shade description rather than just the name, check customer review photos, and confirm the site’s return policy before buying.
How do I find my concealer shade in another brand? Use a shade you already know is a good match, identify its depth and undertone, then look for a similarly described shade in the new brand — comparing actual swatches whenever possible.
Can I find my concealer shade from a photo? Yes, with natural daylight, no filters, and a neutral background, a photo can give you a solid starting recommendation, though it should be treated as a starting point rather than a guarantee.
Why does my concealer look orange after I apply it? This is usually an undertone that runs too warm for your skin, or a formula that oxidizes and darkens after it sets.
Why does my under-eye concealer look gray or ashy? This often means the shade is too light for your actual depth, or the undertone doesn’t suit your skin.
Do I need a color corrector or just a concealer? Mild discoloration is often fine with a well-matched concealer alone. More noticeable redness or dark circles usually benefit from correcting first, then concealing over it.
Does my concealer shade need to change with the seasons? For some people, yes — if your skin deepens noticeably with sun exposure, keeping two nearby shades on hand can help you stay matched year-round.
How do I know how to find your concealer shade for olive undertones specifically? Look for shades labeled olive, warm olive, or neutral olive where available. If a brand doesn’t offer one, a true neutral shade is usually a better starting point than a strongly warm or strongly pink option.
Final Thoughts
Learning how to find your concealer shade really comes down to separating three things that most product pages blur together: how deep your skin is, what undertone runs underneath it, and what job you actually need the concealer to do. Once you’ve nailed down depth and undertone, testing two or three close options in daylight — and giving the formula a minute to settle — will get you a lot closer than guessing from a shade name alone.
If you’re just getting started, the Maybelline Instant Age Rewind or L’Oréal True Match are easy, low-cost ways to practice the testing process. If you want a wider shade range with real olive-leaning options, NARS Radiant Creamy or ColourPop No Filter are worth a look.
For more, check out our guide on the best concealer for dark circles and our color corrector vs. concealer breakdown.
Disclaimer: Product recommendations are based on publicly available product information and general shade-range research. Always confirm current shades, formulas, and pricing on the retailer’s page before purchasing, since brands update their ranges over time.